Sunday, October 23, 2016

Balloon Popping Game

                BALLOON POPPING
MADE BY: HAILEY,EBBA,KELLY

Goal Day 3: i completed cardboard setup on the first day of building
Goal Day 4: I completed decorating border on the second day.
Goal Day 5: I completed adding prizes on the third day.
Goal Day 6: I completed putting on the on the project on the fourth day.
Goal Day 7: I completed testing and adding touches on the fifth day.
Goal Day 8: I completed finishing/completing on the sixth day.


I used decorated tape to attach the cardboard together. I also used
Glitter and pom poms to decorate. And we used different prizes
And put them in boxes known as “prize box”.


During day 5 we got in a big fight about our project and on day 8 it was destroyed
So we had to build it again


We would put more balloons and add better decorations.


Ring Toss Game

Puppy Palooza
Zakary and elliott created a project called puppy palooza ring toss.

We were inspired by a video called caine's arcade we wanted to make a game that was fun for all ages

We ran into some problems such as, the tape we were using as not have a good grip.

The materials we used were, cardboard, cardboard dog, colorful tape, transparent tape, popsicle sticks and lastly transparent paper.

Mini Golf


Mini Golf Game
This is our homemade Mini Golf game! Come to us and will need 1 ticket to play 3 games. You will need to hit the golf ball through the tunnel and get it in the cup.

How we made it
So, we really got a ton of cardboard junk, cut a tunnel, and made to tunnel ends. We used clear packaging tape and regular tape (that really didn’t work).

Our Goals
Goal day 3: We made the cardboard tunnel

Goal day 4: Made the place where you start the hole

Goal day 5: Made the first pathway

Goal day 6: Made the second pathway       (continued down one page)

Goal day 7: Made the obstacles

Goal day 8: fastened everything with packaging tape


That is how we made it!!!

Thursday, October 20, 2016

Skee Ball

SKEE BALL!

This is my project! I created it by using styrofoam to make my  base. I used paper and tape to make my balls also i used and empty duct tape roll to put my tickets inside of then i poked a pencil into the styrofoam and put it through the duct tape roll and then made sure you make a hole so you can pull the tickets out of the front of the game smoothly. To make the dispenser and to make my holes i used a cardboard chrome box to cut holes in and wrote the amount of points on the tops of the holes and to make the ball holder out of a small rectangular  box to hold the balls in but make sure to slant  your box so you can keep receiving the balls! And if you have more time make sure to modify! MY DAY ONE GOAL WAS: OUTLINE/BASE AND RAMP FOR BALLS        
MY DAY TWO GOAL WAS: MAKE BALLS AND MAKE TICKET DISPENSER. MY DAY THREE GOAL WAS: CUT HOLE LABEL HOLES
MY DAY FOUR GOAL WAS: INSERT TICKETS AND MODIFY
MY DAY FIVE GOAL WAS: MODIFY AND COMPLETE ANYTHING I MISSED ON DAYS 1-4

Robotic Table Tennis

ROBOTIC TABLE TENNIS
We built robotic table tennis. The first two days we drew what we wanted. On day three we built the body of it. The next four days we worked on the mechanism. We did detailing  the rest of the time.
We used tape to put it together. All the materials we used were straws (we cut off the bendy part), styrofoam, tickets, and cardboard. We attached the styrofoam to the straws to make the robot pusher.We used the straw to push it. Obviously tickets to play. Our biggest problem was the pusher at first, we use d candle wax the we found straws worked better. Lastly, if we had more time we would make it bigger.

Sunday, October 16, 2016

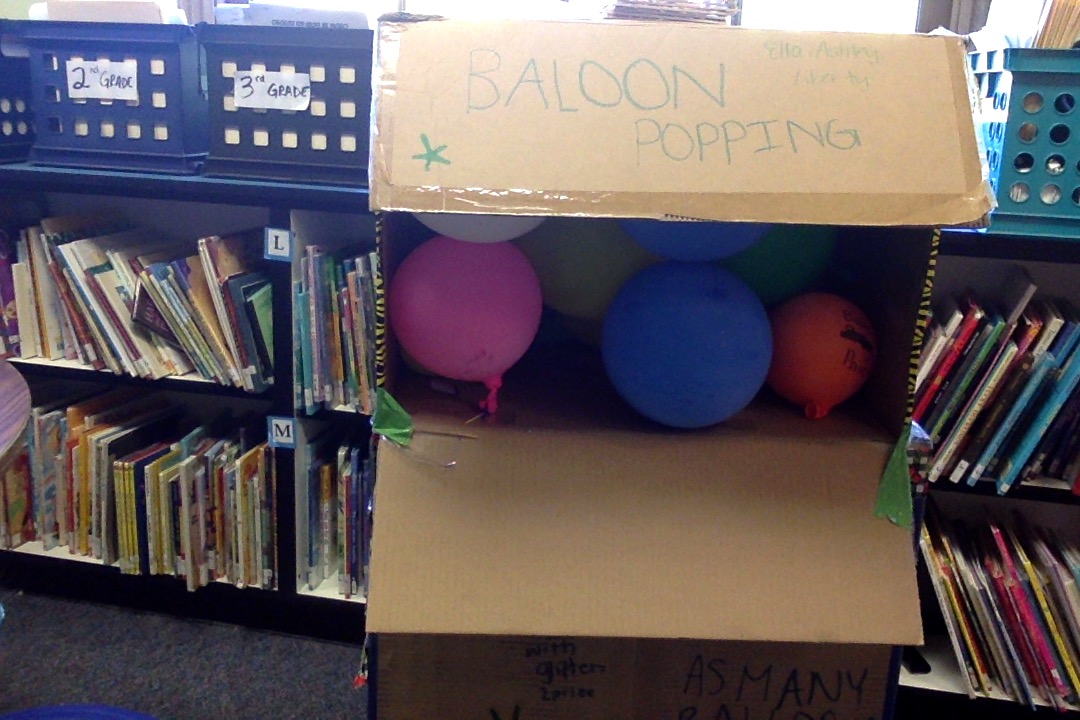
Ballon Popping Game


                    Balloon Popping Game
BY ELLA, ASHLEY, LIBERTY
MY GROUP IS MAKING A BALLOON POPPING GAME.
GOAL DAY 3: I COMPLETED CUTTING THE CARDBOARD ON THE FIRST DAY.
GOAL DAY 4:  WE COMPLETED BLOWING UP THE BALLOONS
GOAL DAY 5:WE COMPLETED MAKING TICKETS.
GOAL DAY 6:WE COMPLETED DECORATING THE CARDBOARD.
GOAL DAY 7: WE COMPLETED TRYING IT OUT


OUR GROUP USED TAPE TO ATTACH THE CARDBOARD TOGETHER.  WE USED DIFFERENT PRIZES AS PRIZES. I ALSO USED PENCILS AND TOYS.
ON THE LAST DAY I GOT GLITTER IN MY HAIR WE SOLVED THE PROBLEM BY NOT USING GLITTER. IF I HAD MORE TIME I WOULD ADD PAINT, COLORS, MORE PATTERNED TAPE, GLITTER PAPER AND MORE GLITTER.

6-sided Die

After receiving our Flashforge Finder 3d printer, I wanted to create something to show students the possibilities when designing an object for the printer. My goal is for my students to understand I'm a learner as well. I'm willing to learn right along with them and do the same work they are doing.

I created this 6-sided die using TinkerCAD. I used a regular box but then I made it hollow using a another smaller "hole" box inside it. Then, I made holes for the numbers on each side of the die.

If I could change anything, I would have made the walls of the die a little thicker. It's really not heavy enough and the sides are too thin to last very long.

Here's the video I created of the Flashforge Finder in action: